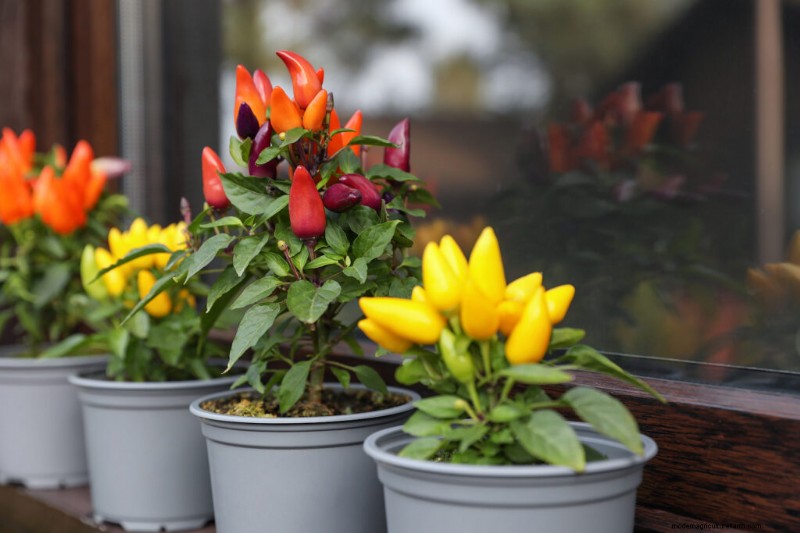
コンテナ菜園を植えることは、地中野菜や家庭菜園を植えることとあまり変わりません。同じ季節要件が適用されます。涼しい季節の作物を早春または晩夏に植えます。春と夏に暖かい季節の作物を植えます。
コンテナガーデンのスペースは、根が生育する土の深さを含めてサイズが限られているため、まず、育てたい作物に十分な大きさのコンテナを選択し、次にコンテナ内でよく育つ作物の品種や栽培品種を選択します。 「コンパクト」、「低木」、または「矮性」と言われる野菜で成功するでしょう。
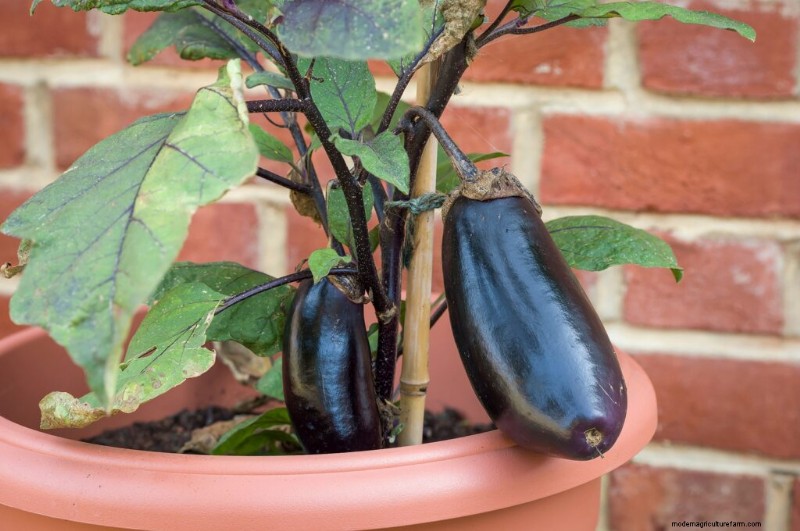
プラスチックポットで育てているナス
コンテナガーデニングの利点
- 開始するために必要なのは、こて、事前に混合した土、容器だけです。
- 手入れが簡単です。コンテナガーデンにはほとんど雑草が生えません。病気の土壌は簡単に捨てられます。ほとんどのコンテナガーデンはパティオ、ポーチ、またはバルコニーにあるため、水はほとんどの場合近くにあります
- コンテナは移動可能です。太陽や季節の変化を利用できます。植物は寒さから守りやすくなります。
- 収穫は早いです。容器をキッチンの近くに置きます。
- コンテナが十分な大きさであれば、地中庭園で育つほぼすべての植物がコンテナ ガーデンでも育ちます。
コンテナ ガーデンは非常に自由度が高いので、農場市場や農産物店ではあまり見かけないグルメな品種を栽培して冒険をさらに深めましょう。いくつか候補を紹介します。スナップエンドウ(丸くて太くてカリカリ)、ミズナ(フリル状のサラダ用の葉)、スベリヒユ(小さな多肉質の葉)。サラダバーネット(サラダの緑色はキュウリのような味)、スパイスバジル(名前に似た味)、ニラ(ジャガイモに添えたり、サルサに入れたり)、ソラマメ(新鮮なものを試してみてください)、ビーツ(赤く巻いてみてはいかがでしょうか)、紫のトマティージョ(もう十分です)、ミニサイズのピーマン(ジングルベルを試してみてください)。
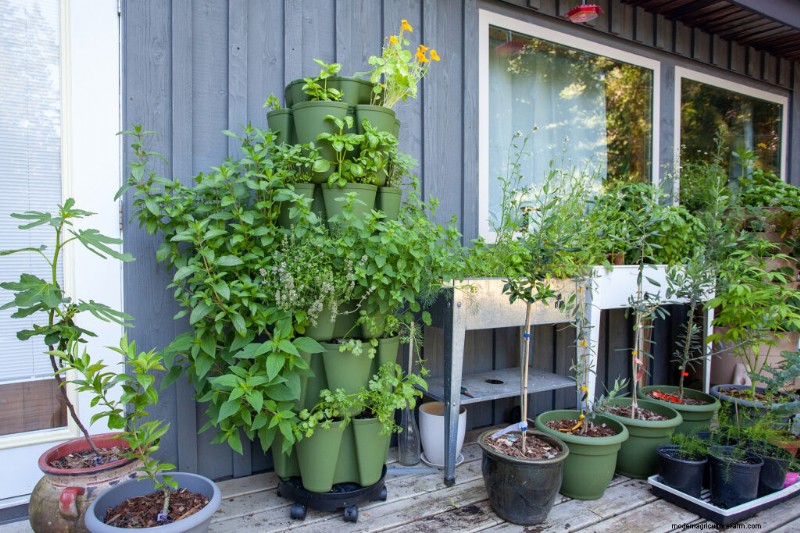
デッキ上の垂直の塔や鉢で栽培
種子カタログをチェックしてください。ほとんどの場合、コンテナ栽培用の品種が推奨されています。ここでは、家庭菜園で試せる野菜やハーブの品種と栽培品種のリストと、1 つの植物を栽培するための最小容器サイズを示します。コンテナ内で複数の植物を栽培したい場合は、コンテナの幅をさらに 4 分の 3 追加します。
ミニチュア菜園を育てることができます。アパート、タウンハウス、またはコンドミニアムにお住まいの場合、コンテナで野菜を育てるのは簡単で楽しいガーデニング方法です。小さな庭を育てるのに必要なのは、日当たりの良いバルコニー、パティオ、中庭、ポーチ、戸口、または窓辺だけです。ほとんどの野菜やハーブは容器に入れても問題ありません。実際、コンテナを日陰から日向に、寒い場所から暖かい場所に移動できれば、成功はほぼ確実です。
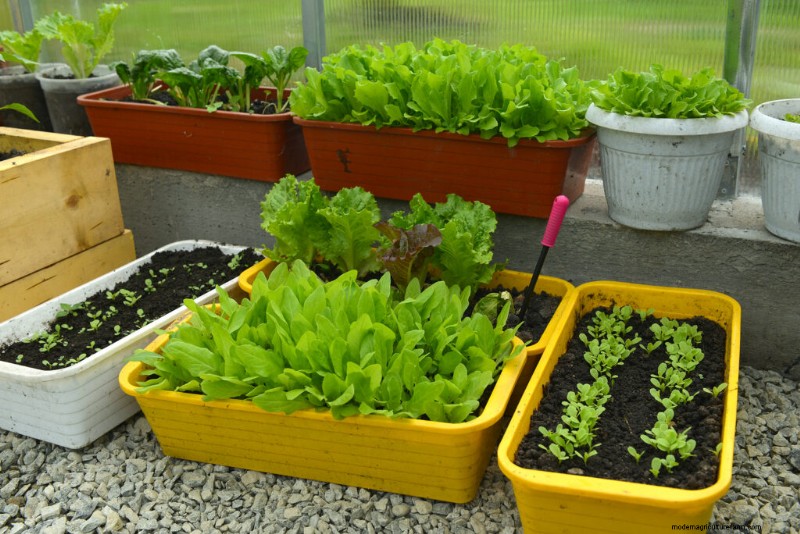
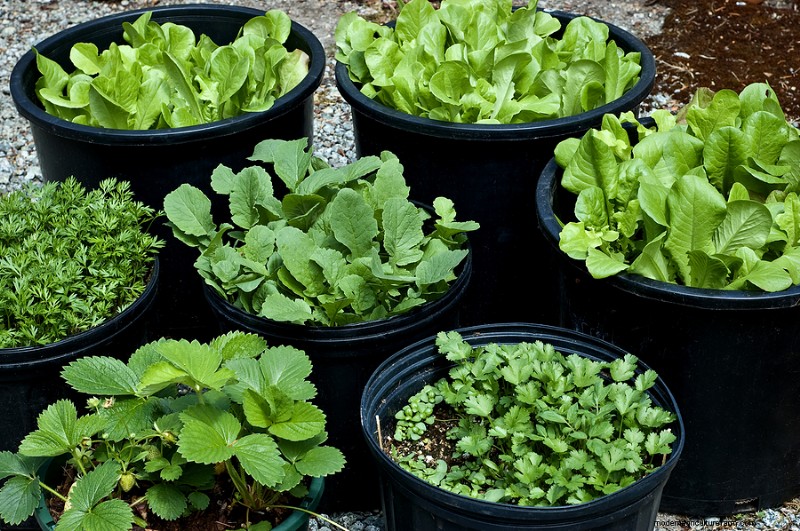
レタスともやしの入った箱と鍋
コンテナの選択
容器は、あなたの好みに合ったほとんどのもので構いません。プラスチックまたは土の鉢、プラスチックまたは木製の窓箱 (セコイアまたは杉は耐久性があり、劣化が遅い)、たらい、ブッシェルまたはワイヤーバスケット、樽などです。古いじょうろや園芸用長靴で野菜が育っているのを見たこともあります。育てたい野菜に応じて、あらゆる種類の容器を即興で作ることができます。
Amazon のコンテナ ガーデン製品:
- Gardzen 10 ガロン栽培バッグ 10 個パック
- 野菜用キャスター付き上げ床
- 野菜用自動水やりプランター
- キャプテン・ジャックのデッド・バグ・ブリュー
- ハリスニーム油植物の病気の管理
プラスチック製のポットは軽量で、通常は安価です。ポリプロピレン成型品が人気で、その多くは土鍋のような見た目をしています。 (薄いプラスチックよりも土の寒さを遮断します。) 粘土鉢やテラコッタ鉢は高価ですが、非常に魅力的です。プラスチックライナーを使用しない場合、粘土とテラコッタはより頻繁に水やりをする必要があります。艶をかけられた鉢も魅力的ですが、排水穴があるかどうかを再確認してください。氷点下が一般的な場合は、木箱、たらい、ハーフバレルが適しています。木製の容器には排水穴があることを確認し、植えたら乾燥させないでください。乾燥しないと、ひび割れたり、形が崩れたりします。

プラスチックのプランターで育てるキャベツ
コンテナの種類
コンテナ ガーデン用のコンテナには、テラコッタ、木材、プラスチック、金属などがあります。 パティオ、バルコニー、または屋上テラスに最適なスタイルをお選びください。
容器が大きいほど、より多くの土や鉢植えの培地、水分、植物に必要な栄養素を保持できるため、必要な水やりや給餌の量は少なくなります。小さな鉢やウィンドウボックスは、暖かい地域や暑い地域では毎日水やりが必要になる可能性があります。大きな鉢は通常、土壌の湿気を 3 日以上維持できます。
車輪付きのコンテナを使用すると、植物を移動させて日光を最大限に浴びたり、暑い季節には日陰を利用したりできます。 Plant キャディには、耐えられる重量に応じて評価されたホイールとキャスターを備えたさまざまなスタイルがあります。
コンテナで植物を栽培する場合、排水を良好にすることが不可欠です。直径 10 インチ/25 cm 未満の容器には、排水を良くするために直径 1/2 インチ/1.2 cm の穴が必要です。直径が 10 インチを超えるコンテナには、2 ~ 4 つの穴が必要です。
少なくとも 8 インチ/20 cm の土の深さは、コンテナ内で栽培されているほぼすべての野菜やハーブから十分な収量を得るのに十分な土、栄養素、水分を保持します。 (水やりは週に 2 ~ 3 回を予定してください。) 容器が小さく、土の量が少ない場合は、より頻繁に水やりと肥料を行う必要がある場合があります。
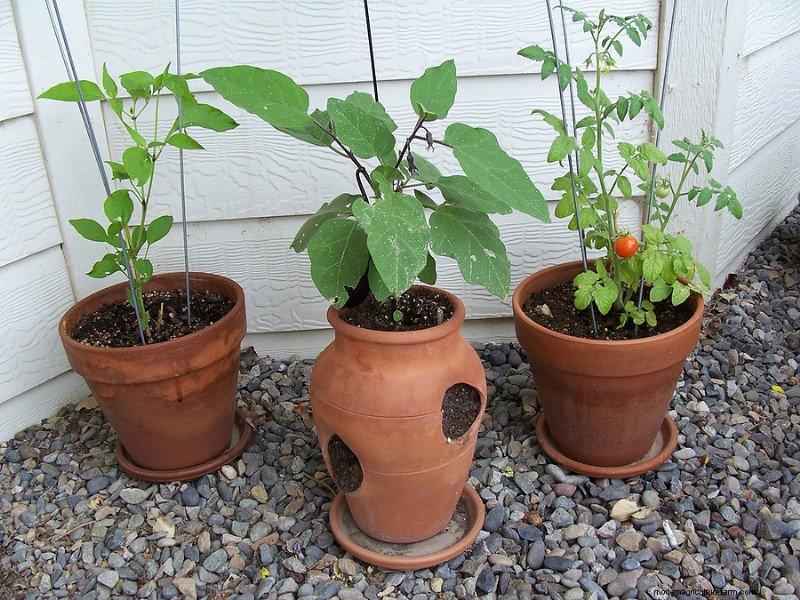
テラコッタ鉢で栽培しているピーマン、ナス、トマト
一般に、コンテナの外観と材質が均一であると、視覚的に快適になります。
- テラコッタと釉薬の鉢 プランターは実績があり、クラシックな雰囲気を持っています。テラコッタは多孔質で、土壌から水分を吸収します。釉薬ポットは湿気をより長く保持します。粘土鉢や釉薬をかけた鉢は重く、一度植えると割れずに移動するのが難しい場合があります。プラント キャディは、これらのコンテナの移動を支援します。
- 木箱と半樽 素朴な外観を持っています。レッドウッドとスギの容器は湿気に耐え、数年間は腐りにくいです。木製の容器は湿気を逃がしてしまうので、水やりには注意が必要です。木製の容器にプラスチックのライナーを敷くと、蒸発が遅くなり、木材が保護されます。
- 亜鉛メッキ鋼 モダンな外観と耐腐食性を備えています。金属製のバケツやトラフは、飼料店や金物店で購入できます。金属製の鍋は保水性に優れていますが、直射日光にさらされるとすぐに熱くなります。金属が土壌を過熱しないように、金属製の容器にプラスチックのシートや景観布を敷きます。
- グラスファイバーと樹脂のポット プランターは軽量で、多くの場合、より重いテラコッタやセラミックのように見えるように製造されています。
- プラスチック製のポット 最もカラフルなものからベーシックな黒の苗床まで、最も安価で軽量で耐久性があり、サイズも豊富です。容器を頻繁に移動する必要がある場合は、プラスチック製のポットが最適です。プラスチック製の容器は湿気を保持するので、水やりの必要性が少なくなります。冬の寒い地域では、プラスチックの鉢を二重にして、鉢の間にミズゴケや新聞紙を敷き、断熱することができます。夏の暑い地域では、黒いプラスチック製の鉢の外側にラテックスを塗ると、太陽の熱を反射できます。
- ファイバーポット バインダーを含浸させた紙は、丈夫で耐久性があり、軽量で、非常に安価です。ファイバー製の容器は水はけをよくする必要があり、水の入った受け皿に放置することはできません。
- 自動給水容器 –貯水池が内蔵されたプランターは、屋上またはバルコニーの庭園に適しています。自動給水コンテナには、土壌用の上部と水用の下部リザーバーがあり、水を土壌に供給するウィッキングシステムが付いています。これらのコンテナは毎日の水やりの必要がなく、トマト、ナス、ピーマン、カボチャなどの渇いた作物に最適です。
- ウィンドウ ボックス スペースが限られていて狭い場合に適しています。木製、テラコッタ、プラスチック製のウィンドウボックスは簡単に見つかります。ウィンドウ ボックスを敷居やバルコニーに安全に固定するには、ブラケット キットが必要です。
- ハンギングバスケット 垂直方向のスペースをすべて活用するのに役立ちます。ハーフバスケットは壁にぴったりフィットします。植え付けおよび水やりをしたハンギング バスケットの重量に適したフックとブラケットを選択してください。ハンギング バスケットは風や日光にさらされるため、一般にすぐに乾燥してしまうことに注意してください。
- バッグを育てる 軽量で柔軟な布製バッグで、ほぼあらゆるスペースにフィットします。栽培バッグは通常、プラスチックで裏打ちされており、湿気を保持します。空になったら簡単に移動したり保管したりできます。栽培している作物に応じて、バッグの側面を上下に回転させて、土の量を変えることができます。
- 底の広い容器 また、トラフは重心が低く、風で飛ばされたり飛び回ったりする可能性が低いため、バルコニーや屋上庭園に適しています。
- 軽量ミニレイズドベッド パティオ、バルコニー、屋上テラスで使用できます。土壌や湿気を表面から守るために景観用ファブリックの下敷きが必要であり、排水が最適になるように配置する必要があります。
3 ガロンのプラスチックポットで栽培されているピーマン
コンテナのサイズ
最善の選択は、できるだけ大きなコンテナを選択することです。豆、キュウリ、ピーマン、トマトには 5 ガロンの容器が必要です (矮性品種は 2 ガロンのポットで十分です)。深さ6インチ、幅約6インチの容器には、大根、レタス、ネギ、クレソン、パセリ、ニンジン、チャイブ、その他のハーブがたっぷり入っています。レタスやほうれん草などの小さな野菜 1 つが 6 インチの鉢で育ちます。 12インチのポットにはレタスまたはほうれん草が4本植えられます。 18インチのポットには最大10本のハーブが入ります。根が詰まりやすく、すぐに乾燥したり水浸しになったりする可能性がある浅い容器は避けてください。余分な水が排出されるように、容器の底に穴を開けます。以前に使用した容器を使用する場合は、植える前に必ずよく洗ってください。
小さな容器に入った葉物作物
容器用土壌混合物
あらかじめ混合された培養土を購入するのが、容器に埋める最も簡単な方法です。袋入りポッティングミックスにはいくつかのサイズがあります。園芸センターやほとんどの金物店では、通常は多目的の土や堆肥である鉢植え用のミックスを販売しています。庭に良好な生育用土がある場合は、それを使用できます。熟成した堆肥、粉砕した表土、ミミズの鋳物、使用済みのコーヒーかす、パーライトの組み合わせを同量加えて、独自の混合物を作ります。 (庭の土だけでは、ほとんどの場合、鉢植えの植物を育てるには密度が高すぎます。)
ポッティングミックスが流れ出ないように、容器の底の排水穴の上に泥炭または滅菌した樹皮の層を置きます。次に、堆肥の層を追加し、次にポッティングミックスを追加します。桶や半樽などの大きな容器は、土を入れる前に最終位置に置きます。年内に大きなコンテナを移動する予定がある場合は、車輪やローラーに乗せて移動します。容器の上部から 2.5 cm (1 インチ) 以内まで充填します。
土壌は植物の根に栄養素と水を供給し、植物を所定の位置に固定します。コンテナ内の植栽培地は限られているため、その組成はそこで生育する植物にとって非常に重要です。
コンテナ植栽ミックスは栄養が豊富で、数日間水分を保持する必要があります。根が適切に発達するためには、柔らかくもろく、圧縮に耐えなければなりません。鉢植えのミックスには、土壌伝染性の真菌病原体や、植物を破壊する可能性のある幼虫、ヨトウムシ、幼虫などの捕食性害虫が含まれていない必要があります。
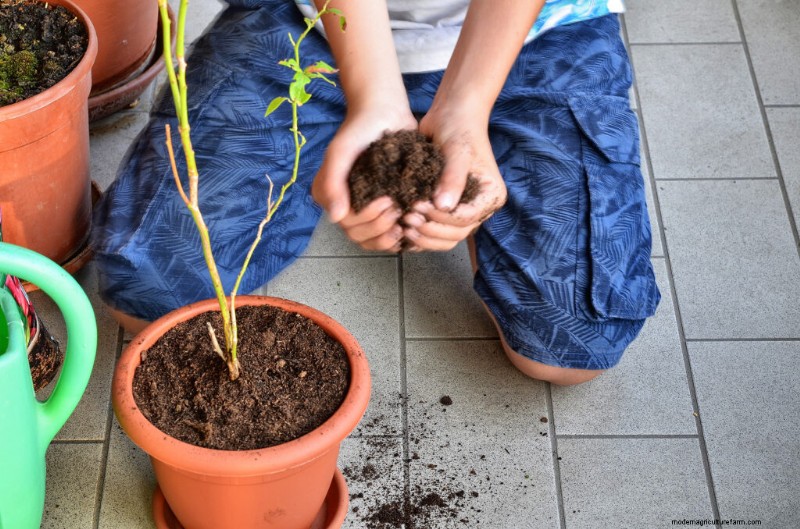
ブルーベリーの鉢に土を加える
一般に、裏庭の土壌はコンテナ植えには適していません。裏庭の土壌は肥沃であるかもしれませんが、多くの場合、粘土や砂が多すぎるか、酸性またはアルカリ性が強すぎる可能性があります。コンテナの限られたスペースでこのような濃度が集中すると、植物の成長に悪影響を与える可能性があります。
植物の健全な発育を確保するための最良の方法は、コンテナ栽培用の植栽ミックスを購入するか、独自にブレンドすることです。園芸センターや保育園では、ブランド名の鉢植え用のミックスが数多く販売されています。保育士に何を勧めるか聞いてください。バルコニーや屋上庭園に適した 2 つの市販の照明ミックスは、Supersoil と Jiffy Mix です。その他の市販のポッティング ミックスには、Pro Mix と Redi-earth があります。
既製のミックスを購入する代わりに、独自のポッティングミックスをブレンドすることもできます。大量のポッティングミックスが必要で、それを保管する場所がある場合は、独自にブレンドする方が費用対効果が高い可能性があります。
ここでは、自宅でブレンドできる 3 つの鉢植えミックスを紹介します。
コーネル大学のポッティング ミックス:
以下は、コーネル大学によって開発されたポッティングミックスです (この配合では、1 ガロン (4L) コンテナ約 3 ~ 4 個分に十分な混合物が得られます):
- 8 クォート (7.5L) バーミキュライト
- 細切りピートモス 8 クォート(7.5L)(注:ピートモスは再生不可能な資源です。熟成した堆肥の代替品です)
- 過リン酸塩 大さじ 2 杯
- 石灰岩 大さじ 2 杯
- 蒸した骨粉または乾燥牛糞 大さじ 8 杯
缶ライナーを敷いたゴミ箱にすべての材料を入れて混ぜます。激しく振ります。これは無臭の混合物で、使用しないものはビニール袋に保管できます。
カリフォルニア大学の鉢植えミックス:
以下は、カリフォルニア大学によって開発された鉢植えの混合物です (この式は、1 立方ヤードまたは 27 立方フィート (0.76 cm) の鉢植えの混合物を作り、これは 202 ガロン (765L) に相当します)。
- 堆肥化したセコイアのおがくず 13 立方フィート (0.36 cbm)
- モミまたは松の樹皮 7 立方フィート (0.2 cbm)
- 粗いミズゴケピートモス 3 1/2 立方フィート(注:ピートモスは再生不可能な資源であり、熟成した堆肥の代替品です)
- 3 1/2 立方フィートの園芸用砂または鋭利な建築用砂
- これらの材料を 1 立方ヤード (0.02 cbm) に加えると次のようになります。
- ドロマイト砂 5 ポンド (2.2 kg)
- 2 ポンド(0.9 kg)の過リン酸肥料
- 硝酸カルシウム 1 ポンド (0.45 kg)
自家製野菜鉢植えミックス:
この混合物は 10 ガロン (38L) の容器 1 つ分に十分です (バッチが大きい場合は、比例して材料を増やしてください)。
- 完全に成熟した堆肥 5 ガロン(19L)(市販または自家製)
- 1 ガロン (4L) の鋭い砂
- 1 ガロン (4L) バーミキュライトまたはパーライト
- 1 ガロン (4L) のミズゴケ泥炭のほとんど
これらの成分をブレンドし、1 カップ (236 mL) の 5-10-10 キレート化肥料を加えて、再度ブレンドします。
市販のブレンドされたポッティングミックスは滅菌された状態で届きます。庭の土や自家製堆肥を含むホームブレンドはそうではありません。雑草の種子や線虫(小さな微細な虫)を破壊し、真菌性疾患を中和するために混合物を滅菌したい場合があります。ミックスを浅い型に広げて 275°F (135°C) で 1 時間焼くことで殺菌できます。臭いを避けるために、焼く前に土を浸してください。
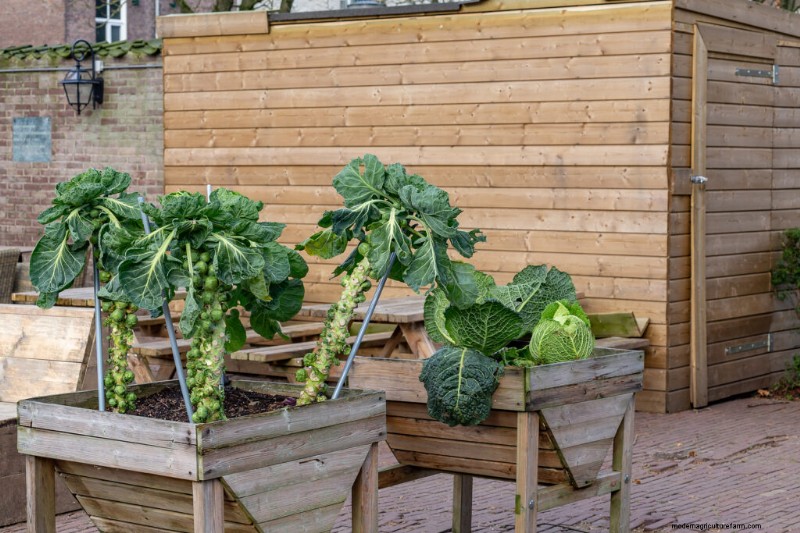
木箱で育つ芽キャベツと緑のキャベツ
Cコンテナ用ロープ
コンテナガーデンには、コンパクトな野菜、矮性の野菜、または成長の早い野菜を選びましょう。レタス、ほうれん草、フダンソウ、ネギ、キャベツなどの葉物野菜は、毎日 5 時間の太陽の光があれば元気に育ちます。大根、ニンジン、ビートなどの根菜類はさらに 1 ~ 2 時間かかります。結実する野菜は太陽と暖かさを最も必要とします。キュウリ、ナス、ピーマン、トマトは、毎日少なくとも 8 時間は太陽に当たることが必要です。豆も同様です。トマト、ピーマン、キャベツは初心者に特にお勧めです。ハーブは容器で簡単に栽培できます。チャイブ、パセリ、バジル、ディル、ローズマリー、セージ、サマーセイボリー、タラゴン、スイートマジョラムなどを試してみてください。
Amazon での成功の種:
- 家宝の野菜の種子 55 種類
- 32 バラエティ パック サバイバル ギア フード シード |非遺伝子組み換え
- 育成ライト付き 60 セル シード スターター キット
- 耐久性のある防水苗ヒートマット
コンテナ ガーデニングに特に推奨される野菜を探してください。これらは、リトル ボール ビーツ、ショート アンド スイート ニンジンとリトル フィンガー ニンジン、トム サムとサラダ ボウル レタス、タイニー ティム トマトやピクシー トマトなど、コンパクトまたは矮性の野菜品種です。
コンテナガーデニングは、垂直ガーデニングを実践する良い方法です。キュウリ、インゲン豆、エンドウ豆、トマトをトレリスで育てることができます。土を入れて植える前に、トレリスをコンテナに置きます。ブドウ栽培作物が成熟したときに転倒しないように、底が広く、より大きな容器を選択してください。
コンテナで栽培できる野菜の品種
野菜品種名の後に、推奨される容器サイズが続きます。
- アーティチョーク :グリーングローブ、インペリアルスター、ヴィオレット;コンテナの深さは 24 インチ。
- リマ豆: ブッシュ・ベイビー、ブッシュ・リマ、フォードフック、フォードフック242;コンテナは幅 12 インチ x 深さ 8 ~ 10 インチ
- 豆をスナップ: ブッシュ ブルー レイク、ブッシュ ロマーノ、コンテンダー、プロバイダー、ラッシュモア、テンダークロップ ストリングレス。コンテナの幅は 1 フィート、奥行きは 1 フィートです。
- ビーツ: ベビーキャニング、バーピーゴールデン、リトルボール、レッドエースハイブリッド、ルビークイーン。コンテナは幅 6 インチ x 深さ 6 ~ 12 インチ
- ブロッコリー: アルカディア、緑の彗星、マンチカン、小さな奇跡。コンテナは幅 8~12 インチ x 深さ 20 インチ
- 芽キャベツ: ジェイド・クロス、オリバー、ルビン。コンテナ幅 12 インチ x 深さ 18 ~ 20 インチ
- キャベツ: ベビーヘッド、ドワーフモーデン、アーリボール、ファストボール、フラッシュ、ミニコール。コンテナは幅 8~12 インチ、深さ 1 インチ
- ニンジン: アミニ、ベイビー フィンガーズ ナント、ベイビー スパイク、ベスト オブ ザ バンチ、ダンバーズ ハーフ ロング、アーリー ホーン、ゴールド ナゲット、キンコー、ナント ハーフ ロング、リトル フィンガー、ラウンド ベイビー、ショート アンド スイート、おやゆび姫、タイニー スウィート。コンテナ幅 10 インチ x 深さ 10 インチ
- カリフラワー: スノークロス、バイオレットクイーン。コンテナ幅 18 インチ x 深さ 2 ~ 3 フィート
- セロリ: コンキスタドール、アーリースノーボール、レッドベンチャー、ベンチュラ;コンテナは幅 8~10 インチ x 深さ 10 インチ
- チャード: ブライトライツ、フォードフック、フォードフックジャイアント、ルクルス、ルビーレッド。コンテナ幅 12~18 インチ x 深さ 1 フィート
- 白菜: チンゲンサイ、ミチリ、ウォンボク。コンテナ幅 1 フィート x 深さ 20 インチ
- コラード:あらゆる種類。コンテナの深さは 12 インチです。
- トウモロコシ:F-M クロス、ゴールデン バンタム、キャンディ コーン、ルーサー ヒル、プレコシャス。コンテナ幅3フィート×深さ1フィート。受粉を確実にするため、コンテナごとに 3 つ
- クレソン: カーリークレス、アップランドクレス。コンテナは幅 8 インチ x 深さ 6 ~ 8 インチ
- キュウリ: バーピー ハイブリッド II、バーピー ピックラー、ブッシュ ベイビー、ブッシュ チャンピオン、ブッシュ クロップ、ブッシュ ピクルス、ファンファーレ、パティオ ピック、ピッカロット、ピックルブッシュ、ポット ラック、サラダ ブッシュ、スペースマスター。ピクルス:ラッキーストライク;コンテナ幅 1 フィート x 深さ 16 インチ
- エディブルフラワー: バチェラーズボタン、カレンデュラ、ナデシコ、マリーゴールド、キンレンカ、ヒマワリ、ビオラ。コンテナ
- ナス: バンビーノ、ブラック ビューティー、ダスキー、イースター エッグ、フロリダ マーケット、ロング トム、ミリオネア、モーデン ミゼット。コンテナは深さ 16 インチ x 深さ 18 インチ
- エンダイブ: ビアンカ・リッチャ、ナタリー、ネオス。深さ 8 ~ 10 インチのコンテナ。
- ハーブ: バジル、ボラージ、カモミール、チャイブ、コリアンダー、ディル、フェンネル、ヒソップ、レモングラス、レモンバーベナ、マジョラム、ミント、オレガノ、ローズマリー、セージ、セイボリー、シソ、タラゴン、タイム;深さ 8 ~ 10 インチのコンテナ。
- ホースラディッシュ: マリナー・クレン。コンテナ 5 ガロン浴槽 – 深さ 3 フィート
- ケール :あらゆる種類。コンテナは幅 8 インチ x 深さ 8 インチ
- コールラビ: 大公。コンテナの深さは 12 インチです。
- ネギ: リチャード王、リンカーン。容器の深さは 10 ~ 12 インチです。
- レタス: ブラックシード・シンプソン、バタークランチ、コス、グリーン・アイス、グリーン・ルーズリーフ、リトル・ジェム、ミニョネット、オークリーフ・レッド・セイルズ、レッド・ファイアー、レッド・ルーズリーフ、サラダボウル、トム・サム。コンテナは幅 8 インチ x 深さ 6 ~ 8 インチ
- マスタード: グリーンウェーブ、オオサカパープル、レッドジャイアント。コンテナの深さは 8~12 インチです。
- 玉ねぎ: バンチングタイプ:ベルツビルバンチング、クリスタルワッドピクルス、ジャパニーズバンチング、ホワイトバンチング、ホワイトペアー。規格:コプラ、アーリー イエロー グローブ、サウス レッドポート。容器の深さは 10 ~ 12 インチです。
- パセリ: ダークモスカール、パラマウント。コンテナの深さは 8 インチです。
- エンドウ豆: バーピーズ ブルー バンタム、アーリー パティオ、ラクストンズ プログレス、リトル マーベル、メルティング シュガー、スノーバード、シュガー アン、シュガー ボン、シュガー ダディ、シュガー メル、シュガー レイ。サヤエンドウ:小さなスウィーティー。コンテナは深さ 1 フィート x 幅 1 フィートです。
- ピーマン: 全品種:カナッペ、ハラペーニョ、ジングルベル、キーストーン、ペッパーリーポット、ピメント、レジスタントジャイアント、レッドチェリー、ヨーロワンダー。コンテナは深さ 16 インチ x 深さ 18 インチ
- ジャガイモ: シャーロット、コブラー、アイリッシュ、エピキュア、ケネベック、レッド ポンティアック、ローズ フィン アップル、ロシアン バナナ、ユーコン ゴールド。コンテナ
- カボチャ: オータム ゴールド ハイブリッド、ベビー ブー、ベビー ベア、ブッシュキン、ジャック ビー リトル、スモール シュガー、スウィーティー パイ。コンテナの深さは 24 インチ。
- ラディッキオ: キオッジャ レッド プレコ、フィエロ、インディゴ、ポール デ フオコ ロッサ。大根。コンテナは幅 8 インチ x 深さ 6 ~ 8 インチ
- 大根: バーピー ホワイト、チャンピオン、チェリー ベル、コメット、つらら、アーリー スカーレット グローブ、フレンチ ブレックファスト、レッド ボーイ、スパークラー。コンテナは幅 5 インチ x 深さ 4~6 インチ
- ほうれん草: あらゆる種類:アメリカン バイキング、ロング スタンディング ブルームズデール、メロディー。コンテナは幅 6~8 インチ x 深さ 4~6 インチ
- サマースカッシュ: クルックネック、アーリー イエロー サマー、エイトボール、ゴールド ラッシュ、ゴールドバーグ、パークズ クリーミー ハイブリッド、ピーター パン スカロッピング、ピクンピック ハイブリッド、リッチグリーン ハイブリッド、ストレートネック、サンバースト、ゼファー。コンテナの深さは 24 インチ。
- 冬スカッシュ: バターブッシュ、ブッシュ ドングリ、ブッシュ デリカタ、ブッシュ テーブル、クリーム オブ ザ クロップ、テーブル キング、クイーン ハート オブ ゴールド。コンテナの深さは 24 インチ。
- イチゴ: アルパイン、サリアン、トライスター。コンテナの深さは 8~12 インチです。
- サツマイモ: ボーリガード、ジョージアジェット、ヴァルダマン。コンテナは 20 ガロン。
- トマト :バスケットパック、コンテナチョイス、ガーデナーズディライト、ハスキーゴールド、ハスキーレッド、ランチボックス、マイクロトム、パティオVF、ピクシー、レッドチェリー、ラトガース、サラデット、スモールフライVFN、スプリングジャイアント、サンドロップ、スーパーブッシュ、スイート100、タイニーティム、トイボーイ、タンブリングトム、イエローカナリー、イエローペア、ホイッパースナッパー。コンテナ矮性品種:幅 6~8 インチ x 深さ 1 フィート、標準品種:幅 2 フィート x 深さ 2~3 フィート
- カブ: ハクレイ、パープルトップホワイトグローブ。コンテナは幅 10 ~ 12 インチ x 深さ 12 インチ
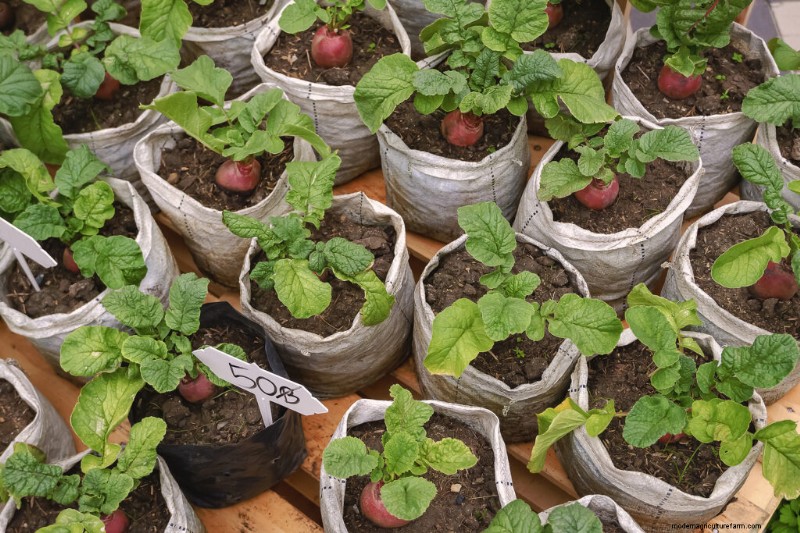
栽培バッグで栽培されているビート
矮性野菜とミニチュア野菜の品種
ミニチュア、ミゼット、矮性野菜はコンテナ栽培に適しています。完全に成熟した真の矮性品種は、通常の野菜品種や栽培品種よりもサイズが小さい可食部分を持っています。ミニチュア、小人、小人は、「赤ちゃん」野菜として販売されている野菜とは異なります。これらは通常、成熟する前に収穫された実物大の品種です。たとえば、ベビーコーンは、ほとんどの場合、殻から糸が出てくる時期に早く収穫される普通のトウモロコシです。
ドワーフやミニチュアは地上の生育スペースをほとんど必要とせず、コンテナに適しています。しかし、植物や果実が小さいため、これらの作物は台所での役割を果たすことや、フルサイズの品種を期待することはできません。おかずや炒め物には小人や小人を検討してください。
ミニチュア野菜の栽培に関しては、間隔をあけたり早めに収穫したりすることを除けば、通常の栽培方法が適用されます。ミニチュア野菜には、通常の野菜と同じ土壌、水、栄養素、光の要件があります。
M 初期の野菜品種 | 収穫までの日数 | D 説明 | 豆 5 ガロンのコンテナ、10 インチ間隔 ドワーフ ミツバチ 80 18 ~ 24 インチのランナー トログリーン 68 18 インチの高さ リマ
ミツバチ 2 ~ 3 インチ間隔 Burpee's Gold Beet 55 直径 1 インチ
5 ガロンコンテナ、1 個あたり 3 植物 54 ゴルフボールサイズ スピネル 52 1.5インチ丸 キオッジャ 55 イタリア家宝
キャベツ 植物ごとに 5 ガロンのコンテナ ベビーヘッド 72 2 1/2 インチヘッド モダンドワーフ 65 4 インチヘッド
マスクメロン グラディエーター アーリーシュガーミゼット 60 中程度の蔓 ミゼットマスクメロン 60 3フィートの蔓 ミネソタ ミゼット 63 4インチのメロン ショートアンドスイート 62 ふさふさした
ニンジン 1 ~ 2 インチの間隔 バニーバイト 65 1 1/2 インチの根 小指 65 円筒形 ショート アンド スイート 68 4 インチの根先テーパー おやゆび姫 60 一口サイズ タイニー スイート 65 3 インチの根
コーン 5 ガロンのコンテナ、15 インチ間隔 ベビーアジア 65 4~5インチの穂 ファリボゴールデンミゼット 60 30インチの植物 ゴールデンミゼット 60 2~3フィートの茎 ゴールデンミニチュア 54 5インチの穂
キュウリ 5 ガロンのコンテナ、15 インチ間隔 ベビーキュウリ 52 ふさふさした蔓、早生 ブッシュワッパー 55 ランナーなし リトルミニー 52 茂みから2フィートまで ミゼット 50 2フィートの蔓、早生 パティオピック 55 バスケット用スライサー ポットラック 56 18~24インチの植物
ナス 長さ6〜8インチの果実 アーリーブラックエッグ 65 5インチの果実、柔らかさ イースターエッグ 65 長さ2〜3インチのリトルフィンガーズ 68 ブッシュ、最も初期の果実 モーデンミゼット 65
植物ごとに5 ガロンの容器 長岡ニューキーシン 65 4 インチの初期の果実、観賞用の白 60 初期の 2 インチの果実 パープル ピクルス 70 小さなナス スリムジム 65 ピクルス、非常に小さい
レタス 4 ~ 10 インチの間隔 ミゼット 55 バタークランチ スウィートミゼット コス 60 高さ5インチ、直立 親指トム 65 テニスボールサイズ、バタークランチ
オニオン 2 ~ 3 インチ間隔 バレッタ 70 小さな丸いピクルス クイックシルバー 70 小さなパール シルバー クイーン 70 小さなパール
ピーズ 2 インチ間隔 アメリカンワンダー 61 12インチ植物、初期のグレータープログレス 62 18インチつる
ジャガイモ 6 ~ 8 インチの間隔 レディフィンガー 80、長さ 4 ~ 5 インチの
カボチャ ゴルフボールサイズのコンパクトな成長物を選びます ジャックビーリトル 90 直径3インチ ミニジャック 90 3~4インチの果物 ウィービーリトル 85 2~4インチの果物 スカッシュサマー 12~20インチ間隔 ベニングのグリーンティント 50 ホタテスカッシュ クーザ 50 レバノン産、4インチ長い
スカッシュ冬 12 ~ 20 インチの間隔 Jersey Golden Acorn 50
植物ごとに5ガロンのコンテナ トマト 5 ガロンのコンテナ、12 インチ間隔 ドロップレット 65 決定的、豊富なアーリーサラダ 45 6~8インチ パティオ 70 15~30インチ、初期のピクシー 50 24インチの蔓 プレスト 60 ロングシーズン、初期のかわいいパティオ 高さ70 30インチ、豊富なレッドクッション 高さ65 18インチ、チェリーサラダトップ 50 高さ18インチ 小フライ 60 ヘビークロッパー、初期 ストークス アラスカ 55 18インチのブッシュ、初期 タイニーティム 50 15インチの蔓、初期 トイボーイ 60 高さ2フィート、初期 タンブリン’トム 55 20~24インチの蔓
スイカ 5 ガロンのコンテナ、12 インチ間隔 バーピー シュガー ブッシュ 80 6-8 ポンド ファミリー ファン 88 やや長方形 ゴールデン ミゼット 65 8 インチ ラウンド ロリポップ 70 3-5 ポンド マーケット ミゼット 69 3-5 ポンド、スイート ニューハンプシャー ミゼット 直径 68 7 インチ、ショートシーズン プチスイート 65 8 ポンド、エクストラシュガー シュガーベイビー 直径 80 8 インチ、スイートシュガーボール 65 12-15ポンド、マルチフルーツシュガードール 72 8-10ポンド、スイートシュガーランプ 直径78 8-9インチ イエロードール 68 3-5ポンド ユースイートシング 70 12-13ポンド、丸型、縞模様
コンテナ内の作物の間隔
野菜の植物が成熟するために必要なスペースを与えることが不可欠です。適切な間隔により、根が水分や栄養素を求めて競合することがなくなり、地上の成長が密集せず、光と良好な空気循環(病気の予防に不可欠)にさらされる必要があります。
葉物作物や根菜類は、コンテナに種をまいて植え始めることができますが、植物が 1 ~ 2 インチ (2.5 ~ 5 cm) の高さに成長したら、間引く必要があります。トマトやピーマンなどの結実する作物は、7~10 cm(3 ~ 4 インチ)の小さな鉢で植え始め、後で大きな容器に移植するのが最適です。
コンテナ内で成長するまで成長する植物間の推奨最小間隔:
- アーティチョーク: 単独で植えます。植物ごとに 10 ガロン (38L) の土
- 豆: 3 ~ 9 インチ (7.5 ~ 23 cm) 間隔
- ビーツ: 2 ~ 3 インチ (5 ~ 23 cm) 離す
- ブロッコリー: 10 インチ (25 cm) 離してください。植物ごとに 5 ガロン (19L) の土
- 芽キャベツ: 10 インチ (25 cm) 離してください。植物ごとに 5 ガロン (19L) の土
- キャベツ: 10 インチ (25 cm) 離してください。植物ごとに 5 ガロン (19L) の土
- ニンジン: 1 ~ 2 インチ (2.5 ~ 5 cm) 離してください。容器の深さは 6 ~ 8 インチ (15 ~ 20 cm)
- カリフラワー: 12 インチ (30 cm) 離してください。植物ごとに 5 ガロン (19L) の土
- ナス: 15 インチ (38 cm) 間隔。植物ごとに 5 ガロン (19L) の土
- ケール: 41 cm (16 インチ) 間隔で薄くする
- レタス: 4 ~ 10 (10 ~ 25 cm) インチ離す
- メロン: 15インチ離れてください。植物ごとに 5 ガロン (19L) の土
- からし菜: 10 cm (4 インチ) 間隔で薄くする
- オクラ: 20インチ離れてください。植物あたり 5~10 ガロン(19~38L)の土
- 玉ねぎ: 2-3 inches (5-7.6 cm) apart
- Peas: 2 inches (5 cm) apart
- Peppers: 8 inches (20 cm) apart; 2½ gallon (9.4L) soil per plant
- Potatoes: 6 inches (15 cm) apart
- Radishes: 1 inch (2.5 cm) apart
- Rhubarb: 12 inches (30 cm) apart; 5 gallon (19L) soil per plant
- Rutabagas: 2 inches (5 cm) apart
- Spinach: Thin to 5 inches (13 cm) apart
- Squash: 12-20 inches apart; 5 gallons (19L) of soil per plant
- Swiss chard: Thin to 8 inches (20 cm) apart
- Tomatoes: ½-5 gallon (2-19L)soil per plant depending on the variety
- Turnips: 6 inches (15 cm) apart
When to plant vegetables in containers
Success in growing vegetables is all about timing—in the garden or in containers.
The temperature has much to do with success growing in containers. Root vegetables are cool-season crops. Leaf and stem crops prefer cool weather. Warm temperatures—and longer days—are needed for fruiting vegetables to grow and mature.
Knowing the average last frost date in spring and the average first frost date in fall will help you plan when to sow seed or set out starts or seedlings—those dates help define the cool-weather crop season and the warm-weather crop season. Mark your calendar with the frost dates, then schedule your planting and harvest. Each crop may have a different start and end date, but a simple calendar will help you keep the garden running smoothly—planting and harvesting.
To make sure you have plenty of time for fruiting crops such as tomatoes, peppers, eggplant, and melons to ripen, you may want to jump-start the season by starting seeds indoors before the last frost.
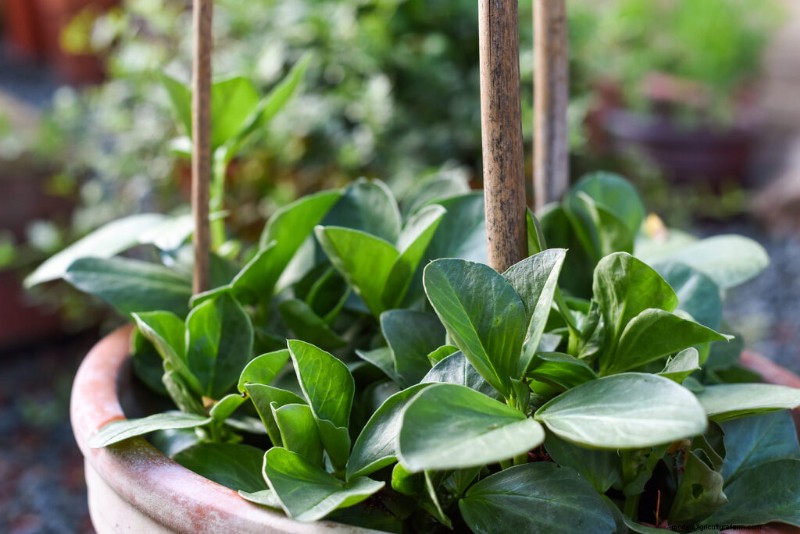
Lima beans growing in a pot
Container planting and harvest times
Here are suggested seed sowing and harvest times for crops you can grow in containers on a patio, balcony, or rooftop.
- Asian Greens: Plants prefer to grow in cool weather; sow seed in early spring and again in late summer. Some can grow inside during winter under lights or in a windowsill; keep temperatures below 70°F (21°C). Most Asian vegetables require 30 to 50 days to reach harvest—depending on the variety.
- Asparagus: Start with one-year-old plants from a nursery (sold as roots in late winter). Plant roots as soon as the danger of frost is past. Harvest comes in the second year after planting; the plant can remain productive for 20 years.
- Beets: From seed, the crop is ready in 8 to 10 weeks; time sowing so that harvest is complete before or well after the summer heat.
- Beans: Sow seeds in late spring and early summer; beans are cold-sensitive and should not be planted until after the last expected frost. Beans are ready in 60 to 70 days.
- Broccoli: Grow broccoli from seedlings. In cold-winter regions, starts can go into the garden two weeks before the last expected frost. Put in a second planting in midsummer for fall harvest. In mild-winter regions, set out starts from early fall through late winter. Time planting so that the crop matures before it becomes really hot. Broccoli is ready to harvest in 8 to 10 weeks.
- Brussels sprouts: Start from seedlings. Brussels sprouts require four to five months of cool weather to mature or a summer temperature of 65°F (18°C) or less. In hot summer regions start in early summer to mature in cool fall weather. Brussels sprouts are ready for harvest in 2 to 3 months.
- Cabbage: Late winter and early spring plantings should be timed to reach maturity before the arrival of hot summer days. Start crops for fall and winter harvest in mid-summer. Cabbage is ready for harvest in 60 to 110 days depending upon the variety.
- Carrots: Start in spring about the time of the last frost and continue until 60 days before the first frost in fall; with ample moisture, they can be grown in the summer heat. Provide shade where exceptionally hot. Carrots mature in 8 to 12 weeks depending on the variety.
- Cauliflower: Bring cauliflower to harvest in cool weather. From seed to harvest allow 12 weeks; from starts to harvest allow six to eight weeks. In cool spring and early summer regions, start plants in late winter or early spring. In warm spring and summer regions, start from seedlings in mid-summer for a fall harvest.
- Celery: Seeds are very slow to germinate so it’s easier to start with seedlings from the garden center. In mild-winter regions, grow celery for winter harvest. In warm-summer regions, plant celery in late summer for fall harvest. Celery is ready for cutting 16 to 18 weeks after sowing.
- Collards: Sow seed in early spring and summer. From seed to harvest allow eight or nine weeks.
- Corn: Sow seed in late spring after frost danger is past or set out starts two weeks after the last frost; in mild winter regions sow in late summer for a fall crop. Corn is usually ready 65 to 80 days after sowing.
- Cucumbers: Sow after temperatures rise to a constant 60°F (15°C) Make a second sowing one month later. Cucumbers are ready to harvest 50 to 60 days after sowing.
- Eggplant: Start with young plants from a nursery or by seed sown indoors at least two months before you plan to transfer them to outdoor containers. Eggplants are ready for harvest 60 to 75 days after sowing—if days and night temperatures stay consistently warm, 70°F (21°C).
- Garlic: Sow cloves in the fall to harvest large bulbs the following summer. In cold-winter regions protect the crop from freezing by covering and insulating the container.
- Horseradish: Start with root cuttings from established plants after the danger of frost has passed. Horseradish is a perennial; protect the container from freezing in winter.
- Jicama: Start seeds indoors for three months before setting it out in a container after the danger of frost has passed. Jicama requires three months of warm temperatures to reach harvest.
- Kale: If summers are cool with an average daytime temperature of 75°F (24°C) or less sow in spring, otherwise sow in midsummer to grow in the cool of fall. Frost improves the flavor. Kale is ready for harvest in 55 days.
- Leeks: Sow indoors at least two months before the last frost. Starts that are 8 inches/ 20 cm tall can be set out in containers from early to mid-summer and can grow for up to 3 months.
- Lettuce: Sow seed in succession from early spring to fall; seed germinates rapidly but starts can be planted where time is short. Allow 50 to 70 days from seed sowing to harvest.
- Melons: Start seed indoors for 4 to 6 weeks before setting them out in a container. Seed can be planted outdoors after the weather warms to 60°F (15°C). Cantaloupes, honeydews, and watermelons require at least 70 days to come to harvest.
- Okra: Okra loves warm weather; sow seed after nighttime temperatures average 65°F (18°C). Allow 55 days to harvest.
- Onions: Plant onion sets or seeds in early spring and make successive sowing. Grow for stems in cool weather—below 70°F (21°C)–for bulbs in warm weather. Bulb onions are ready to harvest in 100 to 110 days; shallots are ready to harvest in 60 to 70 days.
- Peas: Start seed indoors or sow outdoors three weeks before the last expected frost. Fall sowing is recommended for areas with mild winters. Peas are ready for harvest in 55 to 70 days.
- Peppers: Sow seed indoors eight weeks before you plan to set plants out; set out transplants after average temperatures reach 60°F (15°C). Sweet peppers are ready for harvest in 70 days; hot peppers require 60 to 100 days depending on the variety.
- Potatoes: Sow seed potatoes in early spring; potatoes are cold tolerant so you can plant them before frost has passed. In mild-winter areas plant potatoes in mid-summer for a winter harvest. Potatoes are ready between 75 and 130 days to harvest.
- Pumpkins: Sow seeds in the container after the danger of frost has passed or set out starts two or three weeks after the last frost. Most varieties require 100 days or more from sowing to harvest.
- Radishes: Sow radishes indoors anytime during the year; outdoors avoid growing in midsummer and sow the last outdoor crop three to four weeks before the last killing frost. Harvest in 25 to 50 days depending on variety.
- Rutabaga: Crop will mature from seed in three months; time sowing so that harvest comes before or after the summer heat.
- Spinach: Sow seed in early spring and early fall for windowsill and outdoor containers. Make successive plantings ten days apart. Temperatures in the 80°sF (26°C) will cause the crop to bolt. Spinach requires 45 to 50 days from sowing to harvest.
- Squash: Sow seed indoors three to four weeks before the last expected frost; set plants out two weeks after all danger of frost has passed. In warm-winter areas start seed in late summer or set out transplants for fall harvest. Zucchini and other summer squashes require 40 to 45 days to reach harvest from sowing; winter squashes require 70 to 100 days depending on the variety.
- Sweet Potatoes: Start from slips outdoors after all danger of frost has passed. The crop requires 100 to 120 days to reach harvest.
- Swiss Chard: Sow in containers year round except where winters are harsh, then sow in late spring. From seed to harvest allow 55 days.
- Tomatillo: Sow seeds indoors a month before the last expected frost. Set out plants two weeks after all danger of frost has passed. From sowing to harvest allow 85 days.
- Tomatoes: Transplant starts to outdoor containers about two weeks after the last frost. Start seed indoors 8 weeks before you plan to transplant to containers outdoors. Tomatoes require 55 to 100 days to reach harvest depending on the variety.
- Turnips: Crop will mature from seed in two months; time sowing to mature crop before or after the summer heat.
Water, weeding, and care
Container plants almost never need weeding, but you will need to water them more frequently. Container soil should be moist to the touch, but never soggy:too much water rots roots. Water immediately after planting to wash potting mix from the foliage, after that, use a watering can with a fine-rose nozzle to water so as not to disturb the planting mix. (If watering indoors, use a kitchen measuring cup.) Another technique is to water from below, by placing the pot in a watering tray and allowing the water to wick up into the pot for an hour or two. It’s best to water early or late in the day so that the rays of the sun do not damage wet leaves. In warm weather be sure to check your containers every day to make sure they are not dry. Water whenever the soil is dry to a depth of 1 inch. Don’t let containers dry out; that will interrupt quick growth which is essential to container vegetable gardening and can cause plants to drop blossoms and fruits.
Whenever you water look for weeds and remove them and trim away any dead leaves or debris and check for insect pests. Most insect pests can be stopped early with a spray of insecticidal soap–a light squeeze of dish soap in a spray bottle. Twice during the growing season give your container vegetables a feeding of compost tea; this should be enough to replenish the nutrients they draw from the soil. At the start of the next season, it’s best to begin again with fresh, nutrient-rich soil.
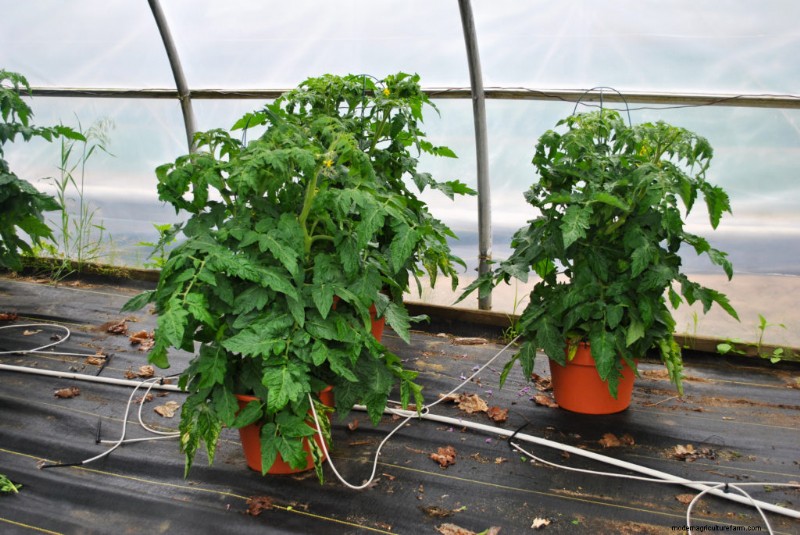
Bush tomatoes in large pots
Care and feeding container vegetable garden crops
Vegetables growing in containers on patios, balconies, or rooftops require special care when it comes to watering and feeding.
Containers have a limited capacity for storing essential nutrients and moisture that ensure plant growth. The gardener must closely monitor container crops to be sure they are growing uninterrupted which, in turn, leads to the best yield and flavor.
Almost all growing crops demand even moisture—that means never letting the soil go completely dry and never overwatering leaving the potting mix soggy. A compost-rich potting mix may supply nearly all the nutrients a crop will need over the length of a season—but feeding with an organic fertilizer may be necessary where containers are small or multiple plants are growing (nutrients are essential).
Use a moisture meter to monitor watering if you have any doubts about how wet or dry your containers are. All garden centers and nurseries will have both dry and liquid organic fertilizers. Ask which fertilizer they recommend and then follow the label directions carefully; it’s always safer to under-fertilize than over-fertilize.
Here are care and feeding suggestions for vegetable growing in containers on a patio, balcony, or rooftop.
- Asparagus: Water every five to seven days during the summer and feed twice a year (early spring and late summer) with a complete liquid fertilizer diluted to half strength. When the leaves begin to brown in autumn cut stems to soil level.
- Beets: Keep the soil just moist throughout the growing season (never over water). Thin seedlings when they are 6 inches tall to stand 3 to 4 inches apart. After thinning, feed once with a complete liquid fertilizer diluted to half strength. Don’t let the soil crust–gently cultivate with a trowel or hand cultivator.
- Beans: Keep the soil just moist as plants develop. Later water deeply. Once plants are a foot tall (30 cm) high, thin to strongest plants and feed keepers with a complete liquid fertilizer diluted to half strength. Feed a second time when pods begin to form.
- Broccoli: Keep soil evenly moist. Feed with a complete fertilizer at full strength twice during the growing season—first when plants are about 8 inches tall and again before heads begin to form. Broccoli is heat sensitive and will bolt and flower when temperatures get into the high 70°Fs (21°C).
- Brussels sprouts: Keep the soil evenly moist water; don’t let it dry out. Feed when sprouts are beginning to form with a complete liquid fertilizer at half strength. As the sprouts begin to cluster, twist off the leaves beneath to transfer growing energy to form more sprouts.
- Cabbage: Keep the soil evenly moist; it must not dry out. Once transplants are established, feed every three weeks until heads begin to form; use high nitrogen, high potassium fertilizer diluted to half strength. Keep soil mounded around the base of the plant to encourage new root development; this will stabilize the plant and hasten maturity.
- Carrots: Keep the soil just moist until harvest. Thin seedlings as they grow to 2 inches between the strongest plants. Feed after the final thinning with a complete liquid fertilizer diluted to half strength; feed again two to three weeks before harvest.
- Cauliflower: Keep the soil evenly moist. The most common problem encountered when growing cauliflower is its failure to set heads. This can be caused by uneven watering or the soil going dry during a heat wave. Feed plants when well-established with a complete fertilizer diluted to half strength and again as curds form. When a head forms, tie the outer leaves up over the head with twine. This will protect the head from the sun and help the curd to blanch.
- Celery: Celery is a bog plant that requires ample, consistent water to thrive. Feed with complete fertilizer diluted to half strength every two weeks. Keep soil mounded up around the base of each plant to stabilize upright growth. Blanch celery quickly by covering the stalks (leaving the top leaves exposed) with a paper bag or opaque plastic seven to ten days before harvest.
- Collards: Keep the soil evenly moist. Mist leaves on hot, dry days. Feed with high nitrogen, and high potassium fertilizer at full strength twice during the growing season.
- Corn: Corn requires eight hours of sun each day to produce the best crop. If full sun is an issue, look for a hybrid suited to your region. Thin plants to 12 inches (30 cm) apart as they mature. Keep the soil evenly moist; don’t let it dry out especially when the weather is hot and dry. Feed with a 5-10-10 fertilizer at full strength every three weeks.
- Cucumbers: Keep the soil evenly moist. Keep the potting mix warm; use black plastic mulch until the weather heats up then switch to aluminum foil; this reflects heat and light under the foliage which discourages aphids. Feed with a high phosphorus fertilizer diluted to half strength when the plant begins to flower and then every other week until harvest.
- Eggplant: Keep the soil evenly moist throughout the growing season; do not let the soil dry out. Feed monthly with a complete fertilizer diluted to half strength. Keep plants in a warm, sunny location. Protect plants on cool nights by covering them with a light plant blanket; cool weather stunts growth and reduces yield.
- Garlic: Keep the soil just moist—not wet. As plants mature make sure containers are in a warm, sunny location.
- Horseradish: Keep the soil mix evenly moist. Feed once during the season with a complete fertilizer at full strength.
- Jicama: Keep the plant in a sunny location for at least six hours each day. Keep the soil evenly moist–never soggy. Feed with a 10-10-10 liquid fertilizer at full strength once during the growing season.
- Kale: Keep the soil just moist. Thin plant to 8 inches (20 cm) apart. Feed with high nitrogen, and high potassium fertilizer at full strength twice during the growing season.
- Leeks: Keep the soil evenly moist–never soggy, which can cause rot. Cool weather will not hurt plants. Blanch leeks by setting a section of 2-inch-diameter opaque plastic tubing or pipe over each one when the stems begin to thicken (mounding with soil is not practical in containers).
- Lettuce: Keep the soil evenly moist but not wet until heads form—too much water can cause rot or head varieties to crack. Feed lightly every two weeks with a complete liquid fertilizer diluted to half-strength. Hot weather can cause non-bolt-resistant varieties to flower. Protect plants from the hot sun with shade cloth.
- Melons: Keep the soil evenly moist; do not let it dry out but be careful not to overwater; overwatering can cause fruit to crack and may reduce sugar content. Keep foliage dry to avoid fungal diseases. Add slow-release 10-10-10 fertilizer into the soil after vines flower; side dress with water-soluble fertilizer a couple of weeks before the first harvest. Melons thrive in warm temperatures. If the weather cools or in short-season regions keep the soil mix warm by covering it with black plastic and positioning containers in direct sun all day. Allow vines to trail or train vines to a trellis if the container is heavy and will not tip. Support trellised melons with netting.
- Okra: Okra grows best in warm weather; sow seed after nighttime temperatures average 65°F (18°C). Keep the soil just moist—never wet.
- Onions: Keep the soil evenly moist throughout the growing season to ensure good bulb development—but don’t overwater which can cause rot. Onions are heavy feeders and should be given a 5-10-10 liquid fertilizer at full strength twice a month.
- Peas: Keep the soil barely moist. Thin seedlings to 3 inches apart and train climbing types on string netting or wooden trellises when tendrils appear. Feed twice during the growing season with a low nitrogen 5-10-10 liquid fertilizer diluted to half strength (too much nitrogen will stimulate leafy growth at the expense of the pods).
- Peppers: Keep the soil evenly moist but not wet throughout the season and particularly during fruit development. Feed with a complete fertilizer diluted to half strength when plants are well established and once more just before blossoms open. Peppers grow best when night temperatures do not dip below 68°F (20°C) at night and stay between 75-80°F (24-26°C) during the day. Use a floating row cover or shade cloth to protect the fruit from sunscald if the weather turns hot (over 90°F/ 32°C).
- Potatoes: Grow potatoes in a sunny location. Keep the soil evenly moist; drought and drench cycles create deformed tubers.
- Pumpkins: Keep the soil evenly moist and do not let it dry out for best fruit development. Avoid wetting leaves which can lead to fungal diseases. Feed after blooming with a 10-10-10 fertilizer at full strength.
- Radishes: Keep the soil evenly; do not let it dry out—but don’t let it get soggy. Thin to strongest seedlings, 3 inches apart. Feed with a 10-10-10 liquid fertilizer, diluted to half strength. One feeding per crop is all that is needed.
- Rutabaga: Keep soil evenly moist throughout the growing season. Thin established seedlings 6 to 8 inches (15-20 cm) apart. Feed one week after thinning and again three weeks after thinning—with a complete liquid fertilizer diluted to half strength.
- Spinach: Keep soil evenly moist throughout the growing season. Once plants are well-established begin feeding with a high nitrogen fertilizer diluted to half strength every two weeks. When plants are 3 to 4 inches (7-10 cm) tall, and thin so the remaining seedlings are 6 inches (15 cm) apart.
- Squash: Keep potting mix evenly moist; keep water off foliage that is susceptible to mildew. Grow squash in a bright sunny place for the best yield. Place black plastic sheeting around the base of plants early in the season to conserve moisture and warm plants; later use aluminum foil to conserve moisture and repel insects with bright reflected light under leaves. Feed with a 10-10-10 fertilizer after fruit sets.
- Sweet Potatoes: Once transplants are established, keep the potting mix just moist—never wet. A month after setting in slips, sprinkle a 10-10-10 slow-release fertilizer into the soil avoiding contact with the stems.
- Swiss Chard: Keep the soil evenly moist throughout the growing season; too little water will cause the leaves to be stiff and coarse. Thin seedlings when 2 to 3 inches (5-7 cm) tall to 6 inches (15 cm) apart. Feed with a complete liquid fertilizer every two weeks once plants are established.
- Tomatillo: Be sure plants get a full day of direct sun. Keep the potting mix just moist throughout the growing season.
- Tomatoes:Keep the soil just moist throughout the growing season; do not let it go dry out and do not overwater (a dry-wet cycle can cause cracking or blossom-end rot). Feed with low nitrogen, high phosphorus food once a month while fruits are developing. Just before harvest stop feeding. Plants sheltered from the wind should get a gentle shake during flowering (this will help ensure pollen drop from the anther onto the stigma—the tomato has a complete flower that self-pollinates).
- Turnips: Keep soil evenly moist throughout the growing season. Thin established seedlings 6 to 8 inches (15-20 cm) apart. Feed one week after thinning and again three weeks after thinning—with a complete liquid fertilizer diluted to half strength.
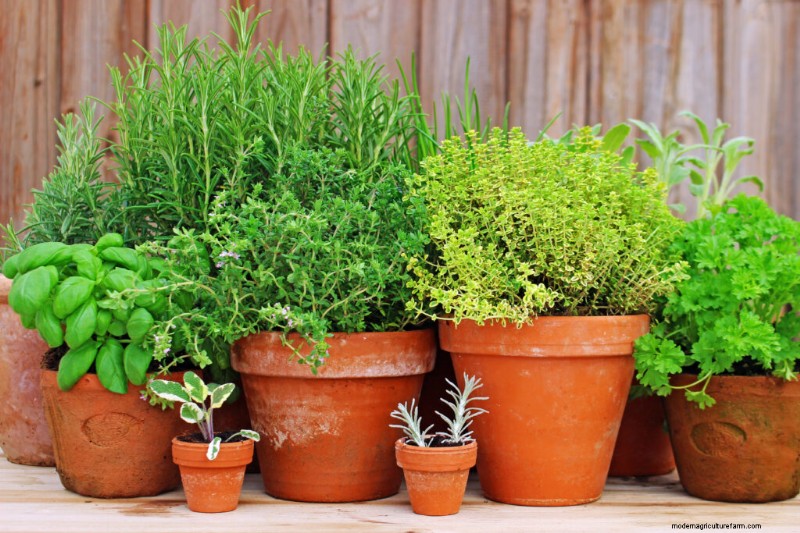
Herbs growing in clay pots
Water-wise crops for containers
Crops that are relatively drought tolerant are best for containers or gardens where water is not easily accessible. Water-wise crops are a good choice for balconies, rooftops, and patios.
All crops need water to grow—especially when first planted and until they are well-established. The best course is to keep the soil just moist—not too wet and not dry whenever possible.
Water pots less than 8 inches (20 cm) in diameter from above; use a 1-quart kitchen measuring cup. Large pots can be watered with a plastic pail, watering can, or a gentle stream from a hose.
Let the soil in a pot or container dry out to 1 inch (2.5 cm) deep before watering again. Infrequent watering is better than watering too often but never let the soil in a container go completely dry.
If you have a large number of pots, a drip irrigation system that hooks up to a faucet or spigot may be the most efficient course.
Water-wise crops include:
- アーティチョーク
- Beets
- Carrots
- Chard
- Garlic
- Herbs—bay, lemon verbena, oregano, rosemary, sage, thyme
- Kale
- Peas
- Scallions
- Spinach
Where water is scarce or not easily accessible, avoid these very thirsty crops:potatoes, strawberries, tomatoes, eggplants, peppers, cucumbers, and zucchini.
Planting combinations
You don’t have to grow just one vegetable in a container. Edible flowers such as pot marigolds and violas can be grown with lettuce. Grow leaf lettuce with parsley, chives, and coriander. Lettuce, onions, beets, and garlic can be grown in a large container with broad beans. Small-fruiting peppers such as ‘Tabasco’ or ‘Serrano’ will make a colorful patio container. Grow tomatoes and basil or thyme together. Ruby chard in its own pot is a colorful accent for any deck.
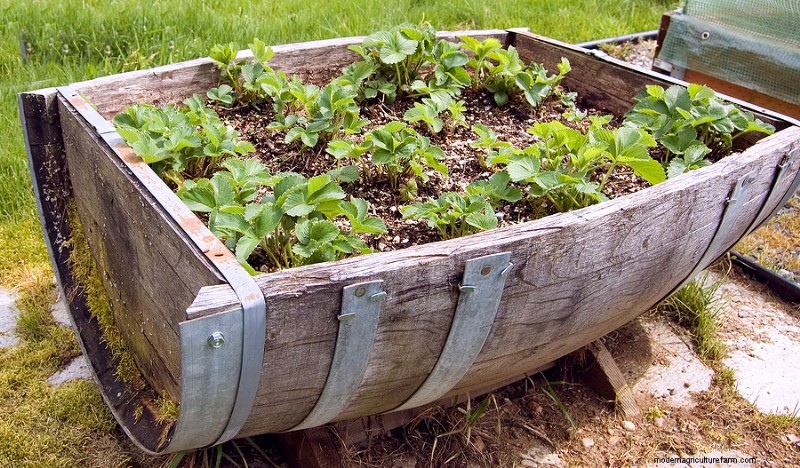
Growing strawberries in a half barrel
Keep your container garden growing
For an extended harvest, make small sowings of different vegetables every three to four weeks during the growing season. Leafy crops can be harvested cut and come again every couple of weeks. To extend the tomato harvest plant two patio varieties a month apart. When the weather turns cold, your container crops can be moved to a warmer location or you can use large clear plastic bags draped over wire frames to form mini-greenhouses that will keep plants growing several weeks after the first frost in autumn. Most vegetables will not grow in the house over the winter; they require a special combination of heat, sunshine, and humidity that is best found in a greenhouse or cold frame. But herbs can be grown indoors over the winter. Expose herbs to gradually warmer temperatures on a porch or in the garage before bringing them into the house for the winter. Herbs can be placed in a sunny window to be enjoyed almost indefinitely.
Also of interest:
Windowsill Gardening
Garden Planning Books at Amazon:
- Vegetable Garden Almanac &Planner
- Kitchen Garden Grower’s Guide Vegetable Encyclopedia
- Vegetable Garden Grower’s Guide
- Tomato Grower’s Answer Book


